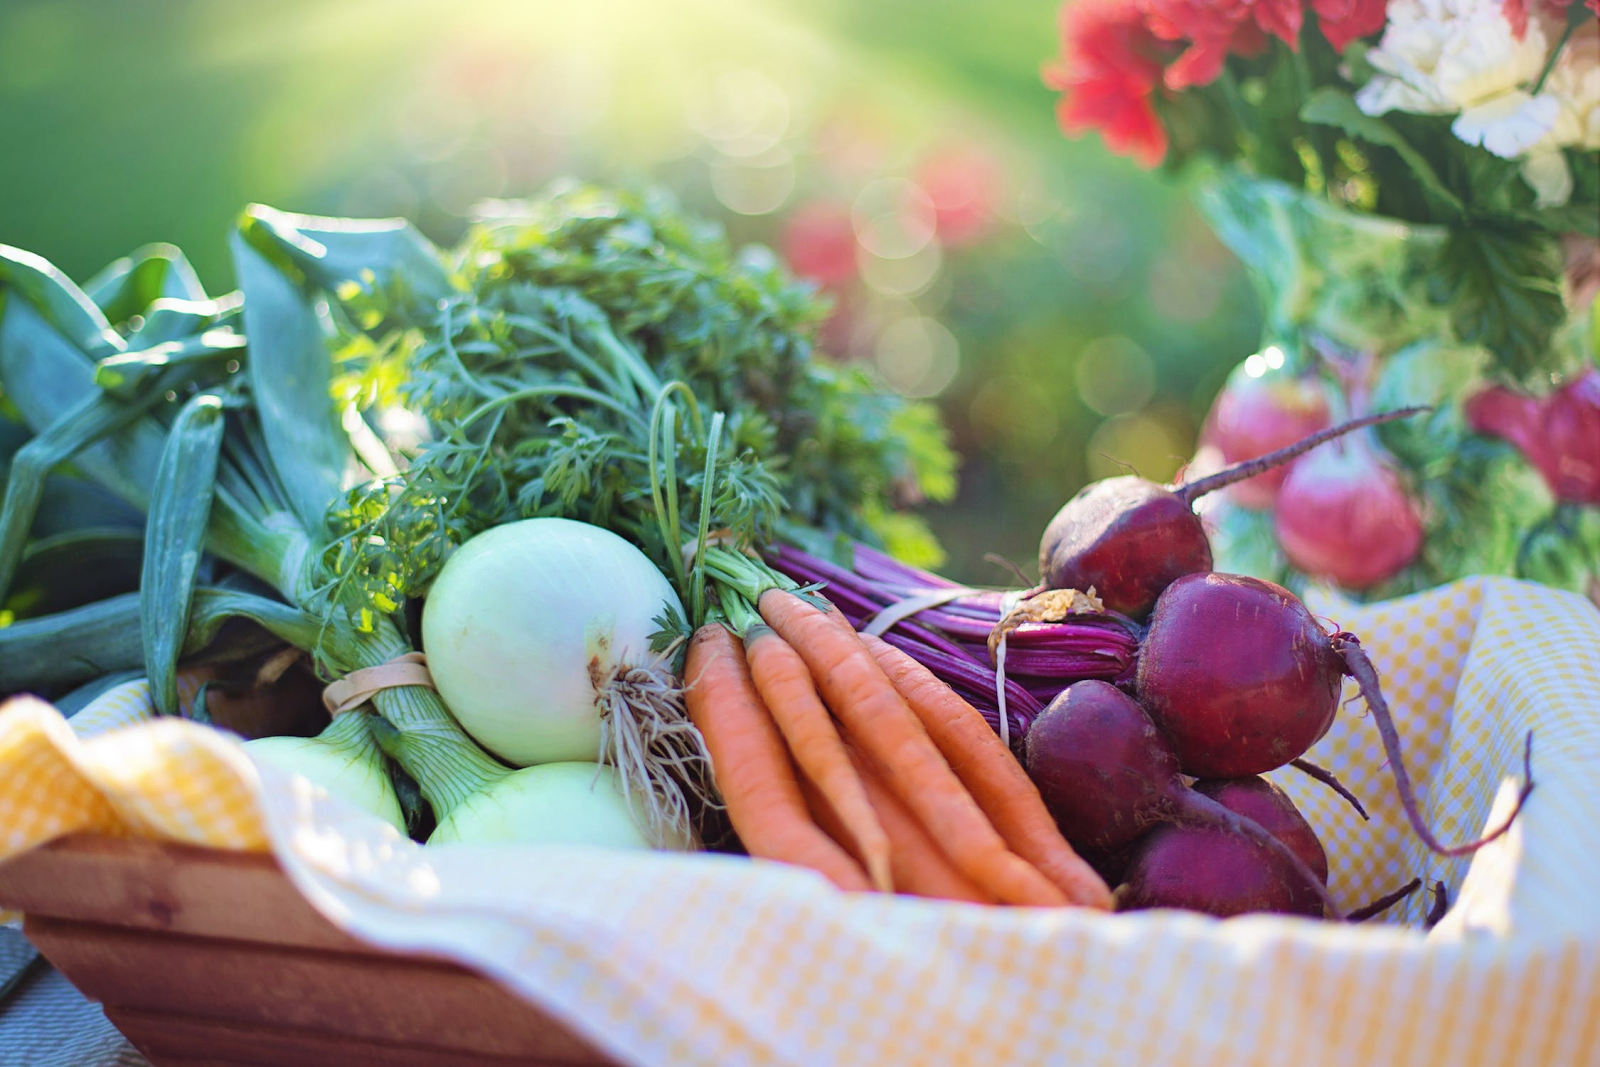
GROWING YOUR OWN FOOD FROM SEED


You do not have to live on a farm to know, vegetables that you grow yourself from seed just taste better. Your vegetables are filled with the good nutrition you want and are spared the harmful chemicals that commercial plants are exposed to.


In this post, we are going to give you some tips to grow your food from seeds. Once you see how easy it can be and experience the fresh tastes of your harvest, you will never go back to grocery store produce.
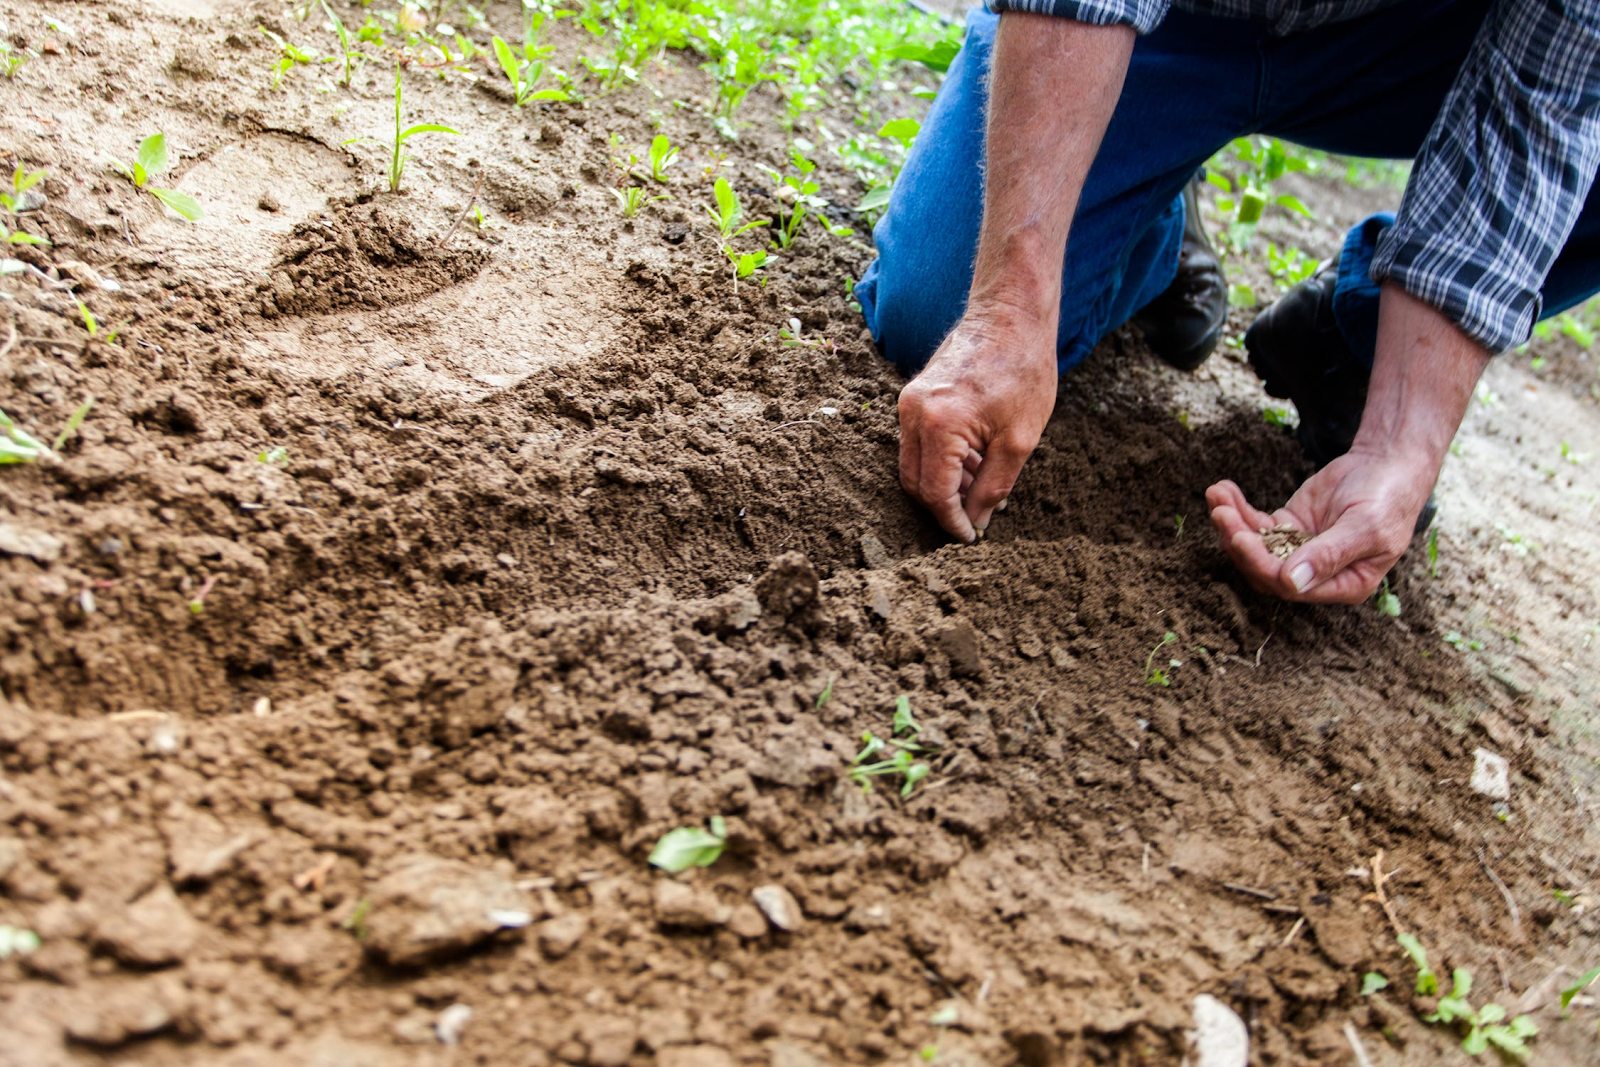


It starts with quality seeds

The seeds you plant are critical to the success of your vegetable garden. Buying seed from a discount store, or a chain department stores is not always a good choice. You do not know if the seed is a high-quality product. You do not know how long and under what conditions the seed has been stored.


Seed Needs is an industry leader in vegetable and flower seeds. Their experts can answer your questions and help you select the seed that will grow best in your area. You get good-grade seed at good prices.

The size of your garden

You do not have to have a huge area to plant a garden. You can begin your plants in containers and then transplant them to a raised garden bed. More important than size is the quality of the garden. A 10X10 garden that is healthy and weed-free is much more productive than a 25X50 garden that is continually under attack from weeds and insects. The main thing is to plant where your plants can get 6 to 8-hours of direct sunlight per day. This will help your soil stay temperature controlled and healthy. If you have areas that are shaded, use those areas to plant leafy vegetables like lettuce and spinach. Peas will also grow well in shady spots.


Also, keep in mind that during dry spells, you will need to water your plants. Watering and harvesting are easier if you plant your garden close to your home.

Soil

The soil you plant in is just as important as the seed you use. Whether you have a container garden, a raised garden, or a traditional in-ground garden, the soil must be moist and well-drained.


Organic matter is best for fertilizing your plants. Compost, peat moss, or manure are good choices for fertilizer. You will also want to invest in a soil thermometer so you can track the temperature of the soil. As you gain experience, this will come naturally to you. But in the beginning, a thermometer is a valuable tool.

How many plants do you need?

If you are a beginner gardener, this is a common question. Many new gardeners plant too many warm-season plants such as tomatoes, peppers, and squash. You need to determine how much of these vegetables your family can eat and how much your garden will produce. For example, one healthy tomato plant will produce about 10 pounds of tomatoes in a season.

Now is the time

Early spring is right for planting most warm-weather veggies. If you are starting your plants indoors, just be sure the threat of frost is over before you transplant them. While you are planting, don’t forget to order some herb seeds. Herbs are easy to grow indoors or out, and there is nothing that makes your fresh veggies taste better than home-grown herbs.

Conclusion

Planting your garden is not difficult. The benefit you get from having fresh food is remarkable. Order your seeds now for your April and May planting.

CHAND BAORI STEPWELL

The steps and pavilion inside the Chand Baori stepwell
Inside the Chand Baori stepwell


The Chand Baori stepwell is a stunning example of Indian architecture and is one of the oldest and most ornamental sites of interest in Rajasthan. Built within the village of Abhaneri (originally named Abha Nagri meaning 'City of Brightness'), the Chand Baori stepwell was constructed in AD 800 and at approximately 30 metres deep it is both one of the largest as well as one of the deepest stepwells in the whole of India.

The pavilion of the Chand Baori stepwell.
The pavilion of the Chand Baori stepwell 
The state of Rajasthan is the largest in India and is well known for its arid and infertile climate, particularly in the region of Abha Nagri. To conserve as much water as possible the Baori (meaning well) was built by King Chanda (hence the name of the well) of the Nikumbh dynasty between 800 CE and 900 CE. The stepwell is located opposite Harshat Mata Temple and was indeed dedicated to Harshat Mata, Goddess of Joy and Happiness upon its completion.

Chand Baori consists of 3,500 narrow steps over 13 stories, and at the base of the well, the air remains a consistent 5-6 degrees cooler than that of the surface. As you would expect the Chand Baori stepwell was used as a community gathering place for locals during periods of intense heat.

Corridor containing artefacts inside the Chand Baori stepwell
Chand Baori stepwell corridor
It is square on plan with the entrance facing north. On three sides the well has double flights of steps, while the northern side consists of a multi-storeyed corridor supported on pillars and projecting balconies which enshrine some gorgeous images of Mahishasurmardini (a buffalo demon in Hindu mythology) and Ganesha (the elephant god). The pavilion and resting room were built for use by royalty only. The surrounding cloisters and entrance pavilion were later editions.

Sadly, today there is no evidence of the old city surrounding the Chand Baori well, only beggars, street traders and stray dogs line the ancient street. This means the site is out of context to its former glory and literally appears to be in the middle of nowhere. The being said, it is a truly beautiful site and well worth making a detour from you journey.

Artifacts from the Chand Baori stepwell
For those who are interested in such things, Chand Baori is also a popular film location. So you can revisit the stepwell in the Best Exotic Marigold Hotel, The Fall and The Dark Knight Rises amongst others.


SELECTION OF PLANT IMAGES FROM THE EADEN PHOTOGRAPHIC LIBRARY

Hello Mark, I have compiled a selection of images below for your perusal.


HOW TO GROW MUSA BALBISIANA 'Atia Black' - THE BLACK BANANA!

A grove of mature How to grow Musa balbisiana 'Atia Black' bananas
How to grow Musa Balbisiana 'Atia Black'


The original species of what is commonly known as the Thai Black Banana - Musa balbisiana, is a species native to eastern South Asia, northern Southeast Asia, and southern China. It is considered to be an inedible form due to the large amount of seeds within its fruit, however it is generally believed to have been part of the diet of local inhabitants as (along with Musa acuminata) it was used in the cultivation of one of the ancestors of modern cultivated bananas. It was first described for western science in 1820 by the Italian botanist Luigi Aloysius Colla (1766 –  1848). So just how do you grow Musa balbisiana 'Atia Black'?

Musa Balbisiana 'Atia Black' is a clump forming cultivar which under favourable conditions can reach a height of 5 metres. It has an upright habit and is particularly noted for its very striking dark stems and dark-green paddle-shaped leaves. When exposed to direct sunlight the stems darken further to almost black! Where conditions are suitable you can expect red to maroon to emerge which once pollinated are followed by large, blue to green coloured fruits.

How to grow Musa balbisiana 'Atia Black'

When growing in the cooler climates of northern Europe plant in a sheltered position which will receive as much sunlight throughout the day as possible. It will perform best in a rich, moist, well-drained soil. Additional watering will be required during periods of drought and a liquid fertiliser can be applied every week or so. Surprisingly it is arguably one of the most cold-hardy banana cultivars capable of tolerating frosts. If winter protection in required, cut of all the leaves to the crown and wrap in a dry mulch (such as straw or hay) and secure with chicken wire. In fact there is anecdotal evidence that the root system of Musa Balbisiana 'Atia Black' can survive temperatures down to as low as -9 degrees Celsius.

In the milder climates a couple of layers of horticultural fleece will be suffice in all but the severest winters. Just remember that the leaves will still need to be removed to reduce the incidence of fungal rots taking hold.

To limit its size you can grow Musa Balbisiana 'Atia Black' as a container plant using as large a pot as you can effectively move with causing injury to yourself. Use a good quality compost such as John Innes 'No. 3', watering and fertilizing regularly over the growing period. As it is no longer in the ground the root system will be at a greater risk of freezing if left outside during harsh winters and so bring it in under protection until the risk of late frosts have passed.

For related articles click onto the following links:

HOW TO GROW MUSA SIKKIMENSIS FROM SEED

Botanical specimen of Musa sikimensis in Quarryhill Botanical Garden, Glen Ellen, California, USA.
How to grow Musa sikkimensis from seed

Commonly known as the Darjeeling Banana, Musa sikkimensis is one of the most popular of all the ornamental forms within the genus, as well as being one of the most widely cultivated. While the true species displays yellow-green foliage like most other banana plants, they are an number of stunning colour morphs which place cultivars such as Musa Sikkimensis 'Red Tiger'.

Young purple striped green leaves of Musa sikkimensis 'Red Tiger'
Musa sikkimensis 'Red Tiger'
Native to both Bhutan and India, Musa sikkimensis is one of the highest altitude banana species. This has benefits for UK gardeners as it is arguably the hardiest species behind Musa basjoo and Ensete lasiocarpa.

Seed is relatively easy find in both good plant retailers and online seed specialists, just buy as fresh as you can to achieve the best rates of germination.

Before sowing your seeds soak for 24 hours in warm water. Then using a seed tray or large modular tray, fill with a good quality seed compost such as John Innes ‘Seed and Potting’. Using a dibber sow the Musa Sikkimensis seed ¼in deep, then backfill the hole with a little more compost. Water thoroughly, but allow the excess water to drain away before placing the tray in a heated propagator or sealing inside a clear polythene bag and placing in a warm bright area. If using a heated propagator set the temperature of around 28 degrees Celsius. Be aware that the germination of Musa Sikkimensis can be slow and erratic taking between 1-6 months to germinate.

Keep the compost moist but not waterlogged and once germinated improve ventilation as fungal infections can take hold on both the foliage and the root system.

Once the root system has established the seedlings can be potted on into 9cm pots and allowed to grow on in a warm, frost free position. Water well during the growing season and feed with a liquid soluble fertiliser every couple of weeks.

Main image credit - By Daderot - Own work, CC0, https://commons.wikimedia.org/w/index.php?curid=37427235
For related articles click onto the following links:
BANANA PLANTS

THE CITRON - Citrus medica

Ripe citon fruits on the tree ready for picking
Citrus medica - The Citron

Widely known as the Citron, Citrus medica is one of just four original citrus species from which all other citrus types have been developed - either through natural hybridisation or selected cultivation. It has been grown since antiquity and as such its true origins are a little hazy. That being said it is generally believed to be native to Southeast Asia as uncultivated specimens can still be found here, although other wild examples have been found in India in the Western Ghats and the valleys at the foot of the Himalayas.

A species of citrus fruit (Citrus sarcodactylis Hort. Bog.): flowering and fruiting branch with separate numbered flower sections. Chromolithograph by P. De Pannemaeker, c. 1885,
The Buddha's hand of Citrus medica
The citron is a slow growing evergreen shrub or small tree, which under favourable conditions can attain a height of approximately 2 to 5 metres. It has an untidy open habit with glossy, ovate, lemon-scented leaves. However it is its large ornamental fruits which have made it a popular choice amongst gardeners. The citron's fruit shape can be highly variable due to the extreme thickness of the pith (otherwise known as albedo). Although not particularly palatable, the albedo is well established in the food industry as candied peel. The colour of the fruits ranges from green for unripe examples to a yellow-orange when overripe. You can't discuss the fruit of Citron medica without mentioning the Buddha's hand form - Citrus medica var. sarcodactylis. This is an unusually shaped variety with fruit segmented into finger-like appendages. These are said to resemble those seen on representations of Buddha. Depending upon the individual selection you can produce close hand or open hand forms. There are even half-fingered forms!

Like the majority of citrus plants, the citron is relatively easy to grow, In the United Kingdom, Citrus medica will not be hardy enough to grow outside permanently as it is easily damaged by even light frosts so it can only be grown as a pot grow conservatory specimen or in the ground as a greenhouse plant. That being said it will be fine growing outside over the summer once the threat of late frosts have passed. Plant into a good quality, soil-based, ericaceous compost, or produce you own by mixing peat-based ericaceous compost and John Innes No.3. It will require plenty of water over the growing season as well as a regular application of liquid soluble fertiliser.

Main image credit - Johann Werfring https://creativecommons.org/licenses/by-sa/3.0/deed.en

For related articles click onto the following links:

HOW TO GROW WALLICHIA DISTICHA - The Fishtail Palm

Wallichia disticha at Else Kientzler Botanical Garden, Sarchi Norte, Costa Rica
How to grow Wallichia disticha


Native to the lowlands and montane rainforests of the Himalayas, India, Laos, Myanmar, Thailand, and Nepal, Wallichia disticha is just one of seven species within the genus named in honour of Danish botanist Nathaniel Wallich (1786-1854). The species name 'disticha' is derived from the Greek 'dis' and 'stichos' (meaning two lines), a reference to the two opposing rows of leaves. It is also the only species within the genus with this unusual leaf arrangement making it both a handsome and desirable species. The arching, pinnate leaves are approximately 2.4-4.5 metres long.

Commonly known as the False sugar palm, Wallichia disticha is a fishtail-like palm with a solitary trunk and large, stiff, feathery leaves which form from (usually) a single trunk. Under favourable conditions you can expect Wallichia disticha to reach an overall height of between 6-9 metres. The canopy is usually half that of the height. Specimens that are cultivated in dry or infertile soils will tend to produce smaller leaves and be smaller in height.

How to grow Wallichia disticha

Wallichia disticha at Else Kientzler Botanical Garden, Sarchi Norte, Costa Rica
How to grow Wallichia disticha
It is an easy to grow species that will perform best in a reliably moist sandy soil in full sun although it will tolerate half-shade in hotter climates. That being said it has proven to tolerate clay and loam soils which can also be slightly alkaline or acidic. Water during extended periods of drought, and improve drainage where necessary to prevent the roots becoming waterlogged over the winter as this cause the premature death of the plant. Feed with a liquid fertilizer rich in micronutrients (such as a liquid soluble seaweed-based fertiliser) to prevent nutrient deficiencies. Low levels of iron and magnesium can cause characteristic yellowing known as chlorosis. Micronutrient deficiencies are usually known to occur in acidic soils.

Wallichia disticha it is widely cultivated in subtropical and warm temperate regions and is surprising cold hardy capable of surviving freezing temperatures down to -2 degrees Celsius. Even colder temperatures can be survived if only for short periods. This means that it is possible to grow Wallichia disticha outside in the milder regions of Great Britain.

Once established avoid moving as the root system of this species is particularly sensitive to being dug up. This will often result in shocking the plant causing it to prematurely come into seed and then die.

Very little maintenance is required other than to remove any diseased, damaged or drying leaves, but do not prune until all of the leaf's green colour has disappeared.

Main image credit - David Stang Else Kientzler Botanical Garden https://creativecommons.org/licenses/by-sa/4.0/deed.en
In text image - By Photo by David J. Stang - source: David Stang. First published at ZipcodeZoo.com, CC BY-SA 4.0, https://commons.wikimedia.org/w/index.php?curid=61220750

HOW TO GROW THE TEA PLANT FROM SEED?

Women picking tea leaves in a plantation of central Sri Lanka
How to grow the tea plant from seed

Tea may no longer be the hot beverage of choice in England, but there are still approximately 165 million cups drunk within this emerald isle every single day.

A blend of Assam, Java, and Ceylon teas
How to grow the tea plant from seed
So with a nice hot cup of tea still up there across the nation why not consider growing your own tea plants and producing your own brew from freshly harvested leaves?

The botanical name for the tea plant is Camellia sinensis, the genus name of which will be familiar to most gardeners for its floriferous cousins.

Now despite popular images of Tea plants being picked in exotic, tropical locations, it is a surprisingly hardy species capable of surviving all but the harshest winters that the UK can throw at it.


How to grow tea from seed

First purchase 'as fresh as you can' tea seeds from a reputable seed supplier. Then before sowing, soak the seeds in tepid water for a day or so. Using a good quality, ericaceous, soil-based seed compost fill a large modular seed tray of 9 cm pots. Alternatively, create your own compost by mixing 50:50 John Innes 'Seed and Cutting' compost and Ericaceous compost. Press one seed into the centre of each pot or module with the eye of each seed facing upwards and cover with a thin layer or vermiculite, horticultural grade lime-free grit, perlite or compost.

Tea plant (Camellia sinensis) from Köhler's Medicinal Plants, 1897
How to grow the tea plant from seed
Gently water in and to help retain moisture, humidity as well as a warm rooting medium to encourage timely germination, place the tray or pots inside a heated propagator with a temperature at approximately 16-18 degrees Celsius. Alternatively, seal inside a clear polythene bag and place on a warm, bright windowsill, but out of direct of full sun. Water using a mister to keep the compost permanently moist but never allow it to become waterlogged. Tea seeds will germinate once overnight temperatures rise above 12 degrees Celsius, emerging from 4-6 weeks onwards.

Once germinated, remove the pot from the polythene bag or propagator. Modular sown tea seeds will need to remain until most of the seeds have germinated but you will need to keep an eye for fungal infections which can flourish in the warm humid conditions.

Once the roots have established in the modules they can be carefully lifted and potted on into 9 cm pots containing good quality soil-based ericaceous compost and moved into a protected environment such as an unheated greenhouse. Keep the compost moist and feed with an ericaceous liquid soluble fertiliser every week or two during the growing season. Once the plants have grown to approximately 30 cm high they will be ready for planting outside into their final position. However they must be acclimated to outdoor conditions over a couple of weeks by exposing them to direct sunshine beginning with one to two hours a day until they can withstand full sun

Tea plants will perform best in a sunny, sheltered position in sandy soil with a pH of 5 to 6.

Main image credit - Christophe Meneboeuf https://creativecommons.org/licenses/by-sa/3.0/deed.en
In text image credit - Selena N. B. H. from Fayetteville, USA https://creativecommons.org/licenses/by/2.0/deed.en
Tea plant (Camellia sinensis) botanical illustration from Köhler's Medicinal Plants, 1897 - public domain

For related articles click onto the following links:

HOW TO GROW THE SWEET BOX - Sarcococca confusa

Feuillage de Sarcococca confusa - Jardin botanique de Strasbourg - France
The 'Sweet Box' - Sarcococca confusa


The 'Sweet Box' - Sarcococca confusa may not be particularly eye-catching, but when you stroll past a specimen in full winters bloom it is undeniably nose-catching, if such a conjoined word exists! The common name is in reference to its similarity to the common box, Buxus sempervirens.

Under favourable conditions you can expect the sweet box to reach a mature height of 2 metres with a width of 1 metre. It is a compact, evergreen shrub with glossy, green, ovate leaves and a spreading habit. The origins of Sarcococca confusa are uncertain but it is generally believed to derive from China. Strangely it is not matched by any wild specimen, but there is some belief that it may have been raised from seeds collected by Ernest Henry 'Chinese' Wilson (1876 – 1930) in Western China. It was subsequently brought under cultivation in England around 1916.

The most notable feature of the sweet box is its highly fragrant, honey-scented blooms. The white flowers with cream-coloured anthers appear over the winter and once pollinated are followed by glossy, black berries 5 mm in diameter. In fact the genus name Sarcococca originates from the Greek meaning 'fleshy berry', referring to the fruit.

The sweet box is relatively easy to grow and will perform well when grow in moderately fertile, moist but well-drained humus-rich soil. It will perform best in shade as the foliage can bleach when exposed to full sun.. Semi-shade and full sun can be tolerated if the soil remains reliably moist during the growing period

It is also tolerant of atmospheric pollution, and once established will also be tolerant of drought and neglect. Like the true box - Buxus sempervirens, it is ideal for creating an informal low hedge.

Sarcococca confusa received the Award of Garden Merit in 1984.

Main image credit - Denis.prévôt
HOW TO GROW THE CHRISTMAS BOX - Sarcococca hookeriana var. humilis

HOW TO GROW TEA

Women picking tea leaves in a plantation of central Sri Lanka
How to grow tea 

If you are a keen gardener and love tea then you may be tempted to try and grow your own tea plant - Camellia sinensis, and process the leaf tips for your own consumption. While there are many Camellia species and cultivars familiar to British gardeners, Camellia sinensis is grown mainly in tropical and subtropical climates and as such is not considered hardy. That being said, some tea varieties are surprisingly cold hardy once established and have proven to shrug off all but the worst weather England has to offer. It is also tolerate of coastal climates. As such there are small, specialist tea plantations (using the 'Clonal One' cultivar) under cultivation in Cornwall in the United Kingdom, and rather surprisingly Perthshire in Scotland. You may be interested to know that Perthshire tea company 'The Wee Tea Company' won the honour of being the best tea in the world at the 'Salon de The' awards in Paris in 2015 for their Dalreoch smoked white tea!

A blend of Assam, Java, and Ceylon teas
How to grow tea
Tea plants are usually grown in regions which receive at least 125 cm of rainfall a year in rich, moist soil in full to part sun, so these conditions will need to be replicated as best as possible in the UK with the likelihood of winter protection required.

When left to their own devices, tea plants can reach a height of approximately 15 metres. However, for ease of harvesting, tea plants are usually kept to waist height. It takes 3-4 years for a newly planted tea plant to be established enough to cope with leaf harvesting. Under favourable conditions a tea plant will grow a new flush every seven to 15 days during the growing season. Leaves that are slow in development tend to produce a better-flavoured tea which is why Perthshire tea growers produce some of the best leaves in the world.

How to grow tea plants in containers

To keep it simple for cold protection, consider growing a tea plant in as large pot as you can comfortably move to a protected area when necessary. The key to successful cultivation is the rooting medium. It will need to be well-drained, moisture-retentive, slightly acidic compost. That can be achieved by mixing equal parts John Innes 'No3' compost, ericaceous compost and well-rotted farm manure and lime-free horticultural grit. It will perform best in full sun but will the compost must be kept moist at all times during the growing season to prevent the growing tips from drying out. That being said, do not allow the soil to become waterlogged as the roots can easily perish under this conditions.

Feed with a liquid soluble acidic fertilizer once every couple of weeks during the growing period.

Once temperatures look to start dropping below 7 degrees Celsius move your pot grown specimen to a frost free position such as an unheated greenhouse. Once spring temperatures rise, and the threat of late frosts have passed, your tea plant will need to be acclimated for a week or two before being left outside in their final position.

How to grow a tea plant outside

Despite being associated with tropical and subtropical climates the tea plant is surprisingly robust in all by the worst of our British climate. However when cultivated for tea leaves the plant can be cropped more frequently and provide a better quality product when grown in favourable conditions. Ideally a south-facing, terraced hillside can provide the sunny aspect combined with good drainage, although irrigation may be required over the summer. Enrich the soil prior to planting with well-rotted farm manure and mulch every autumn taking care not to have the mulch touch the plants trunk.

Main image credit - Christophe Meneboeuf https://creativecommons.org/licenses/by-sa/3.0/deed.en
In text image credit - Selena N. B. H. from Fayetteville, USA https://creativecommons.org/licenses/by/2.0/deed.en

For related articles click onto the following links:
HOW DO YOU TAKE CARE OF A CAMELLIA BUSH?
HOW TO GROW THE TEA PLANT FROM SEED?

WHAT PLANT DO YOU GET TEA FROM?

English black Tea, a blend of Assam, Java, and Ceylon tea leaves
What plant do you get tea from?

If you are English then you are likely to have a strong emotional (and possibly addictive) relationship with tea. However besides from knowing that tea is made from an infusion of processed tea leaves then it is also likely that you will not know from which plant the tea leaves are from.

Botanical illustration of Camellia sinensis, the tea plant.
What plant do you get tea from?
The origins of tea date back so far into history that it is impossible to say when it was first drunk but records show that it was originally taken as a medicinal beverage in Southwest China approximately 3000 years ago, prior to it first becoming popular as a recreational drink during the Chinese Tang dynasty (618 - 907). Tea came to the attention of the English during the 17th century after being brought back to Europe in the 16th Century by Portuguese merchants.

The plant from which you get tea is called camellia sinensis, the genus name of which will be familiar to most gardeners. The traditional Chinese name for Camellia literally means 'Tea flower', while the wester name is in honour of Rev. Georg Kamel (1661–1706), pharmacist, and missionary to the Philippines and who incidentally did not discover or name this plant, or any other Camellia species. The species name 'sinensis' is Latin for 'from China'.

Camellia sinensis is an evergreen shrub with broad, glossy leaves. The young leaves emerge light green in colour, darkening as they mature. Under cultivation tea plants are usually kept at a height of approximately 1.5-2 metres to make it easy to pick the fresh leaf tips. When picked for tea production only the top 2–5 centimeters of the mature plant are picked. These buds and leaves are known as 'flushes'. A tea plant will typically grow a new flush every seven to 15 days during the growing season in subtropical to tropical climates.

When left to its own devices you can expect a mature tea plant to reach a height of 16 metres. Unfortunately it is only considered to be half hardy and cannot be grown outside in England without winter protection.

Main image credit - Selena N. B. H. from Fayetteville, USA https://creativecommons.org/licenses/by/2.0/deed.en
In text image - By Franz Eugen Köhler, Köhler's Medizinal-Pflanzen - List of Koehler Images, Public Domain, https://commons.wikimedia.org/w/index.php?curid=255290

For related articles click onto the following links:
HOW DO YOU TAKE CARE OF A CAMELLIA BUSH?
HOW TO GROW A COFFEE PLANT FROM SEED

HOW TO GROW MANDARIN ORANGE FROM SEED - Citrus reticulata

Mandarin orange plant growing in the snow
How to grow the Mandarin orange from seed

Check out any decent book on citrus plants and you will be surprised at just how many cultivars there are available bearing in mind there are little over 20 species across the entire globe. This is because they can hybridise easily and have been done so in Asia for many thousands of years! In fact according to molecular studies, hybridization between mandarin, citron, pomelo, and the papeda are responsible for most other commercial citrus varieties,

The mandarin orange - Citrus reticulata, is one of those true species and as such will grow true from seed, and luckily enough is relatively easy to germinate. To begin with you will need to obtain fresh viable seed. This can be achieved by collecting your own seed from shop bought fruit or purchase your own from a reputable online seed retailer.

Self-collected fruit will need to be cleaned so that any pulp has been removed and will be ready for immediate planting without any further preparation. Purchased seeds are likely to have dried off a little and as such will need to be soaked for 12-24 hours in tepid water.

How to grow the Mandarin orange from seed

Using modular seed tray or small terracotta pots (approximately 7-9 cm in diameter) filled with a good quality soil-based compost such as John Innes 'Seed and Cutting', sow in seed per pot or module approximately 1 cm deep. Gently water in and move to the warmest, brightest part of the house but without direct sunlight and keeping the soil moist but not waterlogged at all times. Watering can be reduced by placing the trays or pots under a covering plated of Perspex or glass or keep them inside a clear, sealed polythene bag. This will also help to maintain high humidity. Germination times are directly affected by soil temperature and that can be improved by placing the pots or tray inside a heated propagator at a temperature at approximately 18-22 degrees Celsius. You can expect germination to occur from 14 days onwards, however germination will be erratic. That being said, viability of mandarin seeds is high so don't throw un-germinated seeds away until they gave been allowed a month or two to emerge.

Germinated seeds can be removed from the heated seed tray or sealed bag and placed in a cooler position. If used, any germinated plants under the covering plate will also need to be removed

Once the seeds have reached 3-4 inches high they can be potted on in to a larger pot with slightly acidic, richer soil-based compost.

In regions prone to freezing conditions your mandarin plants can be grown as a houseplant or as a container plant outside once they have been acclimated for a week or so before being left in sunny conditions. Be aware that Mandarins will need to be brought back under protection once overnight temperatures reach 6-7 degrees Celsius. Do not re-acclimatise in the spring until the threat of late frosts have passed.

Keep the compost moist and feed with a liquid soluble citrus fertiliser ever couple of weeks during the growing season.

Main image credit - SuperJew https://creativecommons.org/licenses/by-sa/3.0/deed.en

For related articles click onto the following links: